VTR FAIRING
Stock Hawks do not have any kind of front fairing, they are basically considered “naked” bikes. From early on, I had wanted to fit a fairing on my Hawk to give it that competition or sport bike look. Since Hawks were not designed for a fairing, there was really no place to fit a front subframe, which is typically used to locate not only the fairing but the instruments, headlight and mirrors. I ended up having a boss welded to the frame to accomplish this, which is detailed in the Frame Modifications section.
The decision to use the Honda VTR fairing was based on the bike being a street-only machine and wanting to keep the clip-on handlebars above the top triple clamp. The “other” popular fairing – the ubiquitous RC31 – as well as the other RC30/45 variants requires locating the clip-ons below the top triple clamp. While this may make for the hot set-up for racing, I knew I wouldn’t be able to ride for very long on the street hunched over that far. Basically, only fitting some other street bike fairing would allow for this clip-on placement so the search began for a suitable candidate. Hawks, by nature, are very narrow bikes. When I originally fitted the fairing, the VTR had only been out about a year and there were very few other V-twin sport bikes – mostly all being in-line 4 cylinder bikes. The in-line 4 makes for a fairly wide motorcycle, especially when compared to the wasp-ish lines of a Hawk GT. One look at a VTR parked next to an F3 (new bikes at the dealership at the time) made it obvious. The VTR was fairly narrow compared to the F3, so the decision was made to use a VTR fairing then and there.
I used an OEM (Original Equipment Manufacture – ie: Honda) subframe (with slight modifications), along with the Honda VTR headlight assembly and rear view mirrors. Here’s a shot of the subframe and headlight:
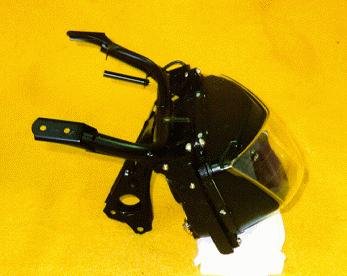
This bolts to the tab welded onto the frame head and locates the whole schmola. I also had to fabricate some extra mounting tabs for the sides of the fairing:
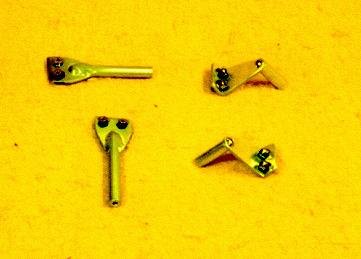
The long ones are located up under the tank, the L tabs are down towards the rear beside the engine.
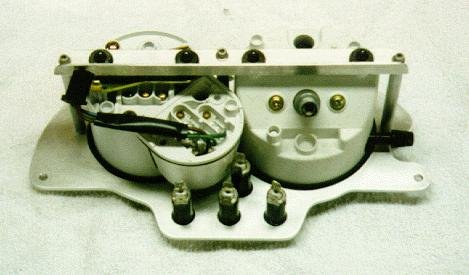
Next was the instruments. I considered many options, but the most straightforward approach was to utilize the OEM Hawk gauges. I laid out several instrument panel designs, but ended up with a fairly conventional “side-by-side” layout due the positioning of the various elements up front – like clip-ons/controls/mastercylinder/etc. I fitted aftermarket indicator lamps and re-mounted the OEM gauges in a custom aluminum panel. I reused the original rubber grommets to insulate the gauges from vibration like stock. The panel mounts up to the subframe so it is stationary like the fairing. Here’s a shots of the gauge set-up from the rear:
Last but not least, the fairing itself. Sharkskinz supplied a very nice fiberglass “street” version of the VTR fairing. Sharkskinz is well know for their high quality race glass. It required a small amount of trimming on the bottom and I located the windscreen with several additional mounting screws, as opposed to the (4) that are fitted to a stock VTR.
With all the parts in hand, one basically ends up with a DIY Kit!
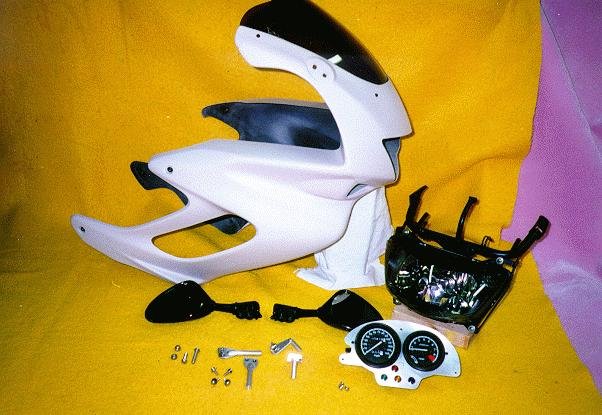
Once all the preliminary trial fitting was done, the fairing a and tail section (not shown here) were sent to a local painter/body shop to paint match the OEM Honda red finish supplied on 1989 Hawk GTs.